

BLOG

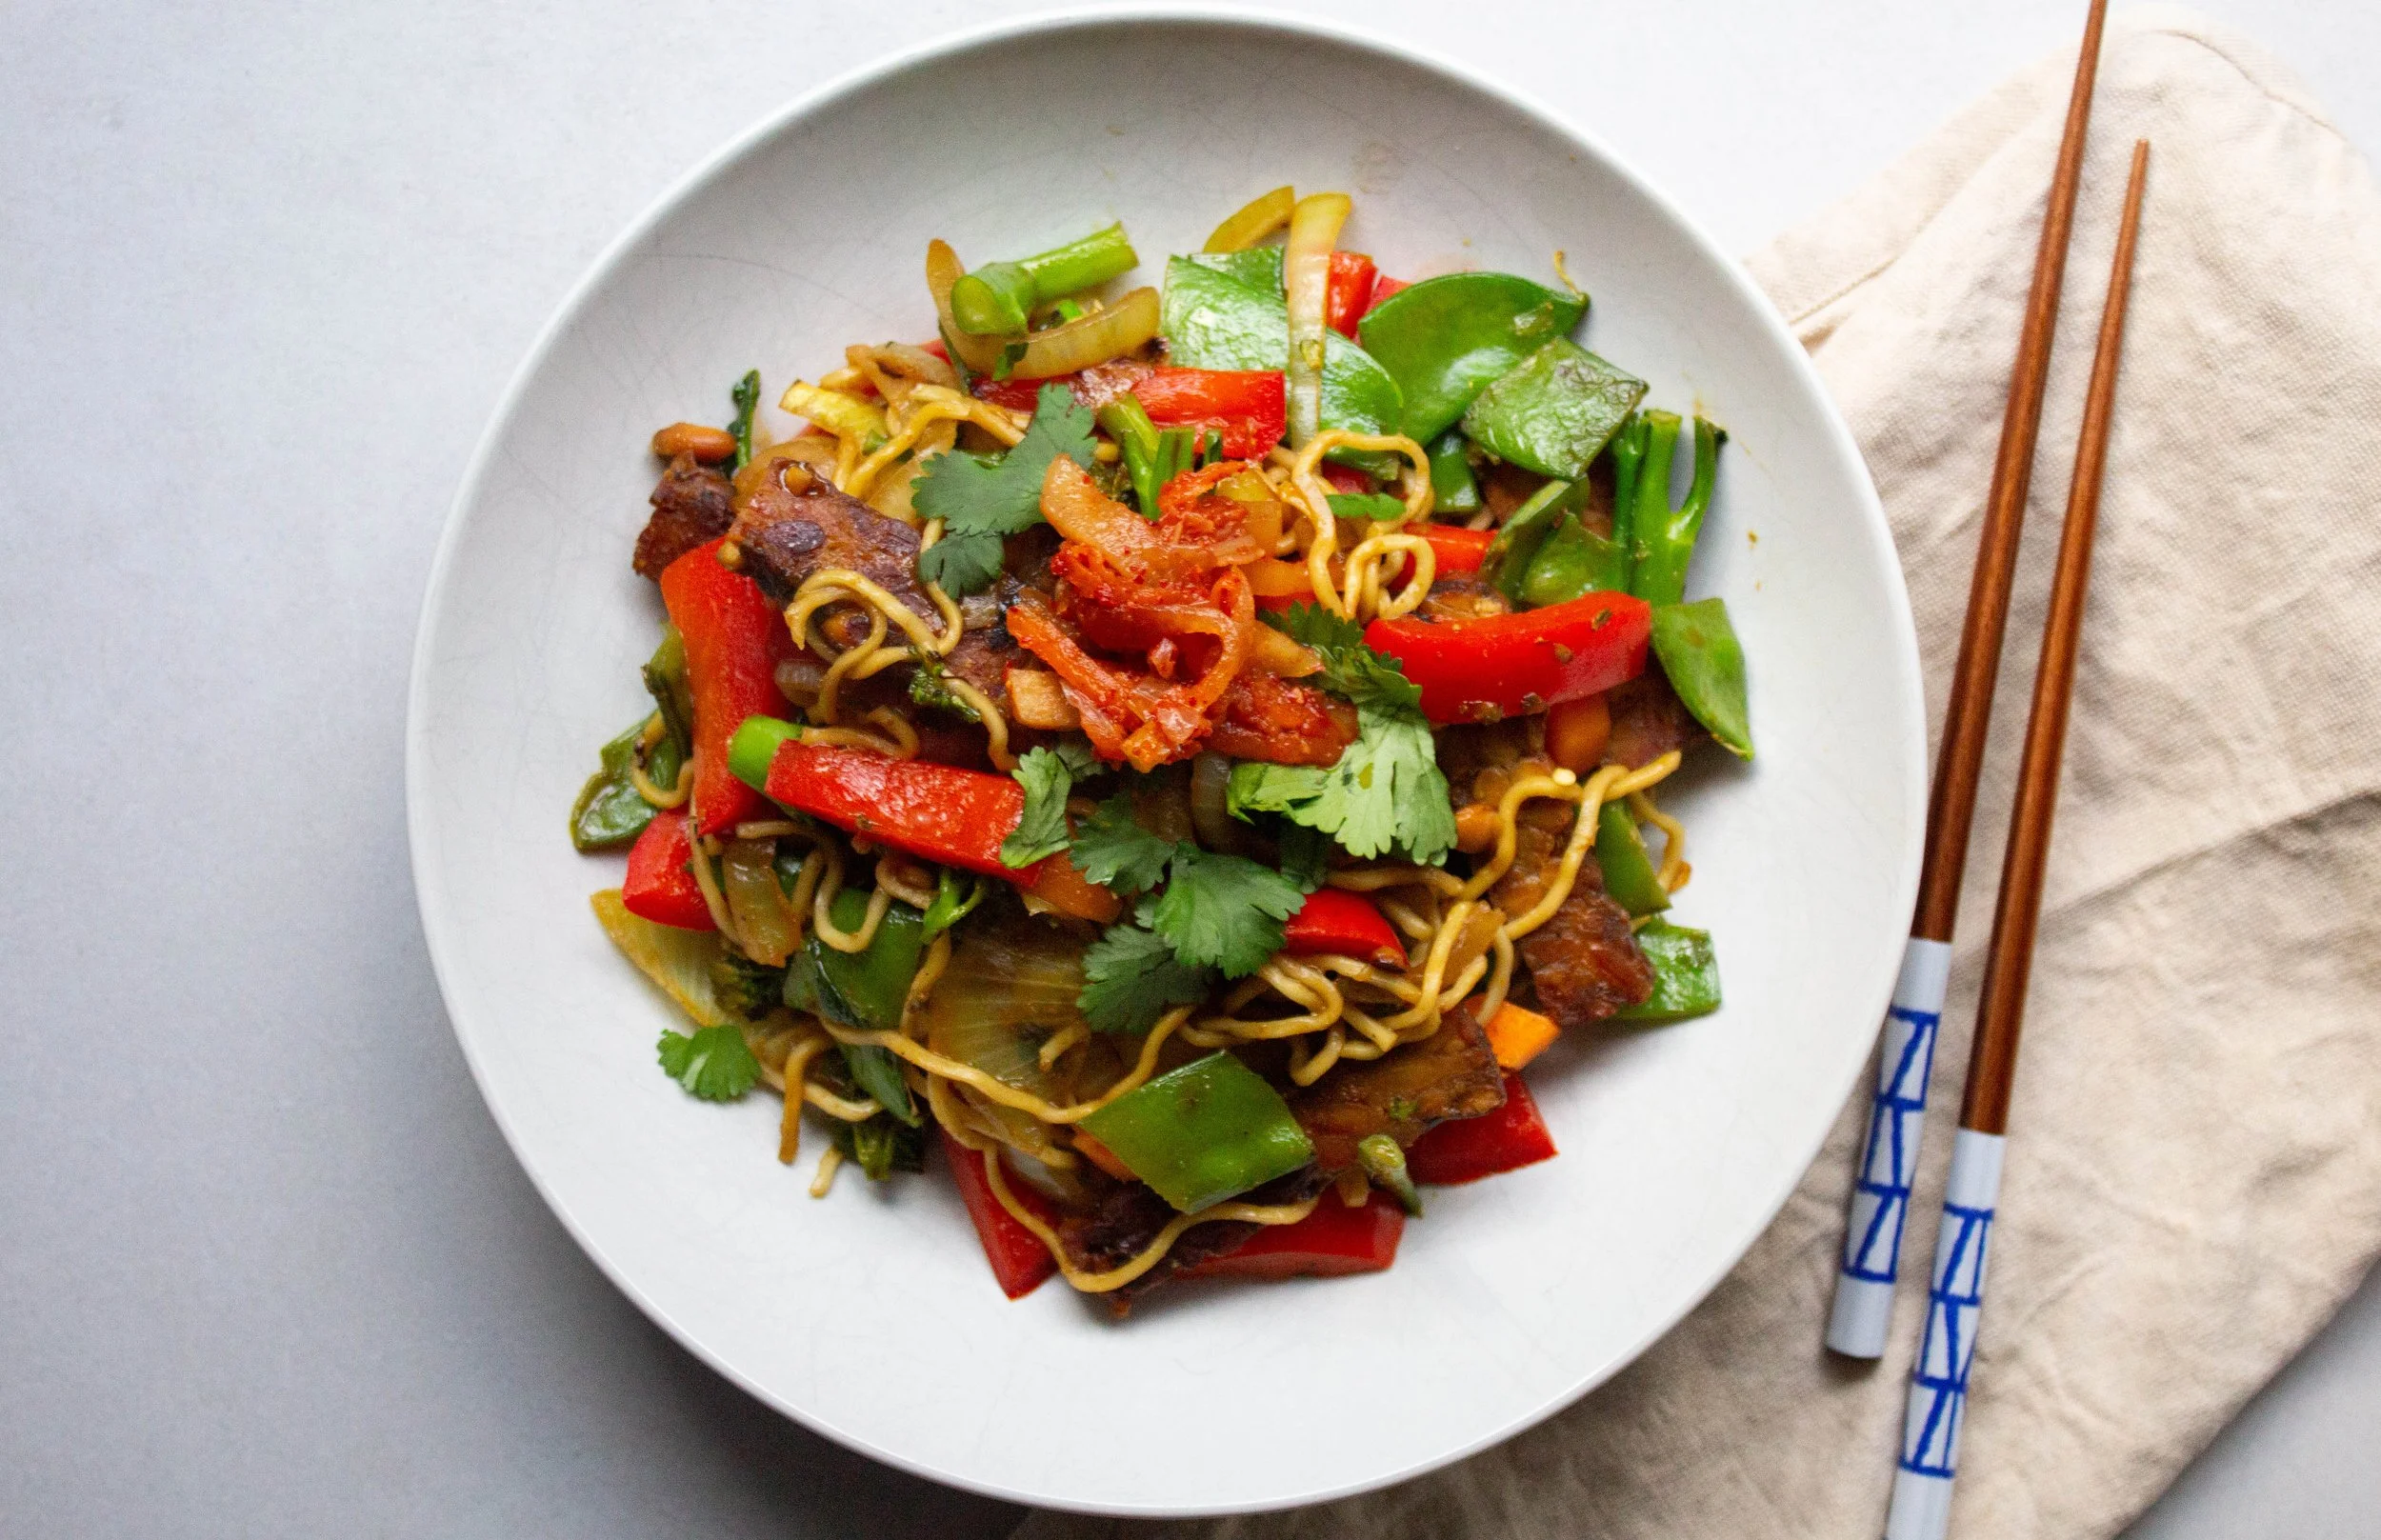
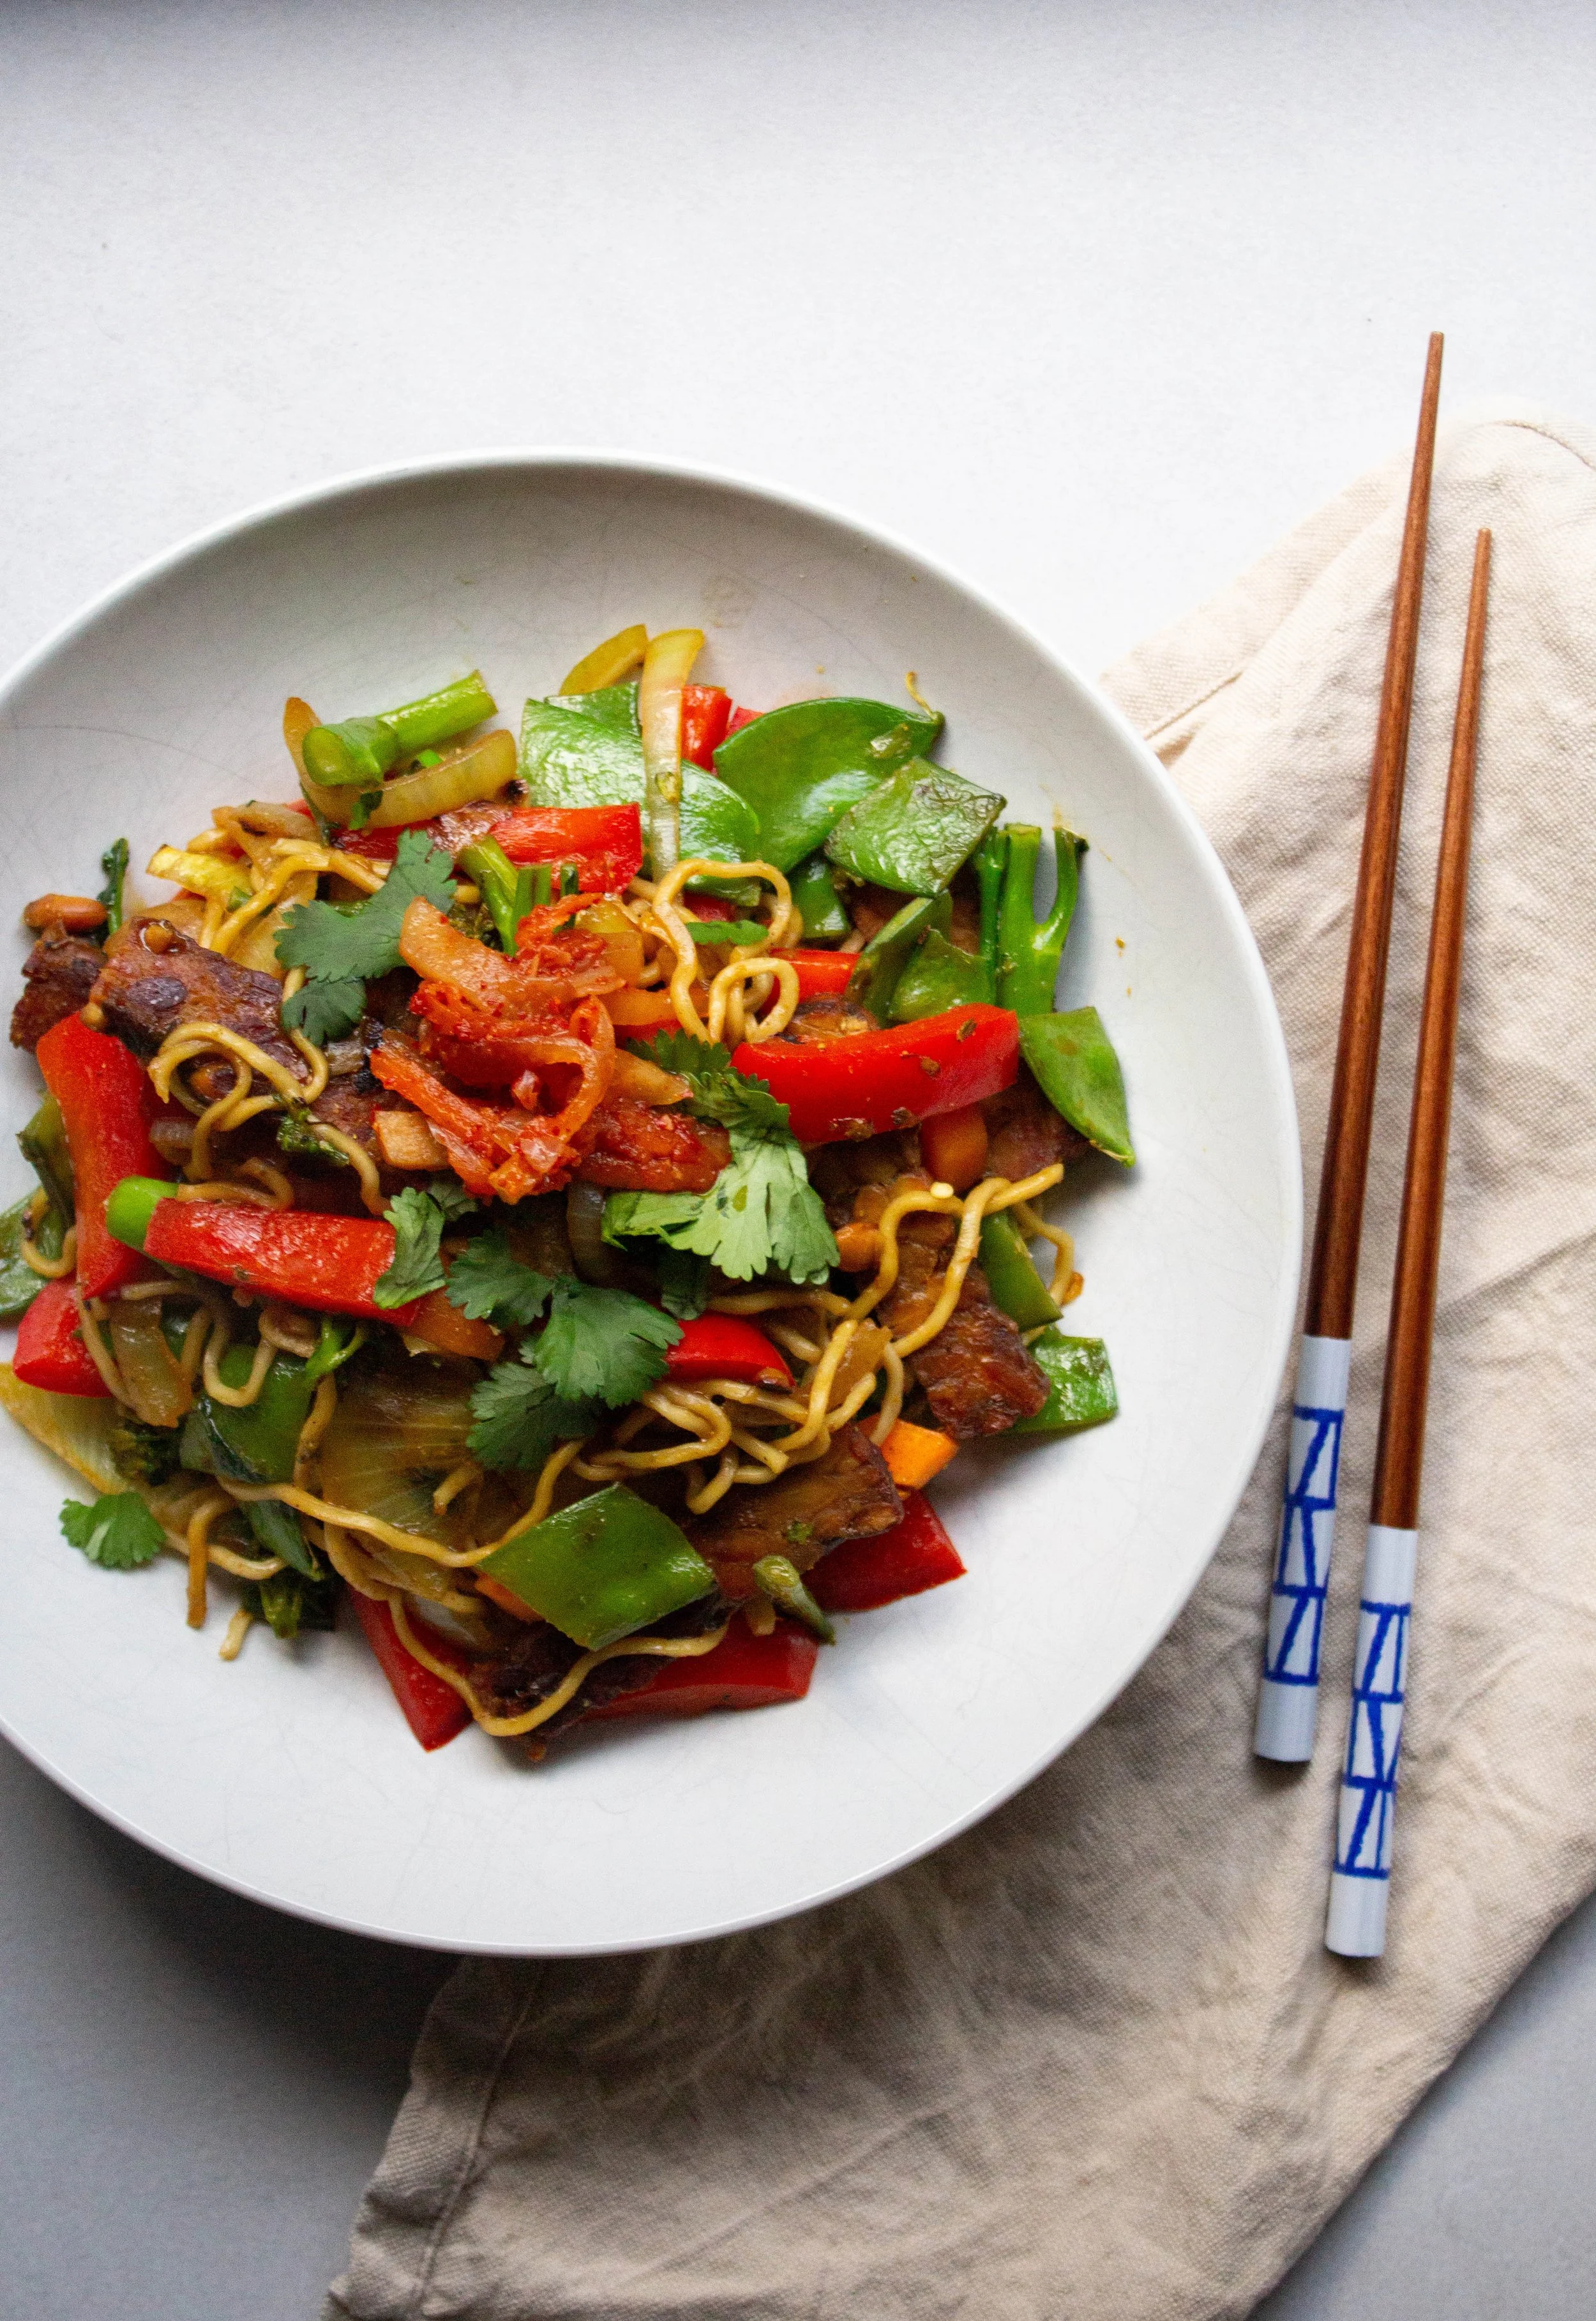
Simple Singapore Noodles
If there's a dish that is so simple but so tasty that it has become an almost weekly regular in our house (which is unheard of because I test recipes for a living so it's rare we have weekly regulars), it's this one!
If there's a dish that is so simple but so tasty that it has become an almost weekly regular in our house (which is unheard of because I test recipes for a living so it's rare we have weekly regulars), it's this one!
I only got onto making my own Singapore Noodles recently and whilst dishes like this can't often beat the traditional authentic recipe, for how simple this is, I think it really does give it a run for it's money. I've used tempeh here for a vegetarian version but you could totally sub in any protein you wish (chicken and prawns go particularly well).
Serves 4
Ingredients
2 tablespoons tamari
2 tablespoons mirin
1 teaspoon curry powder (or 2-3 for a stronger curry flavour)
Pinch of pepper
400g marinated tempeh, cut into strips
1 x brown onion, halved and sliced
1 x red capsicum, sliced
1 x bunch broccolini, cut into 2-3cm lengths
2 x carrots, cut into half moons
1 x handful snow peas, ends and string removed, cut into 2cm lengths
250g noodles (I used life long wheat noodles but soba are great too)
To serve (optional): coriander/ kim chi / spring onion
Directions
Combine the tamari, mirin, curry powder and pepper in a bowl. Set aside.
Heat a large saucepan filled with water to the boil, ready for the noodles. Meanwhile, heat a wok to medium-high heat and cook the tempeh until just crispy on each side (or if using chicken brown off, or prawns cook until just cooked through but not too golden), remove and set aside.
Turn the wok up to high heat, add a drizzle of extra virgin olive oil and saute the onion for 1-2 minutes. Next add the remaining veggies and cook for 3-4 minutes or until just tender. Meanwhile cook the noodles according to packet instructions and drain.
Add the noodles and tempeh/chicken/prawns into the wok with the veggies. Drizzle over the sauce and toss well. Serve.
For more easy mid week meals try these:
- Quinoa & Chicken Veggie Soup

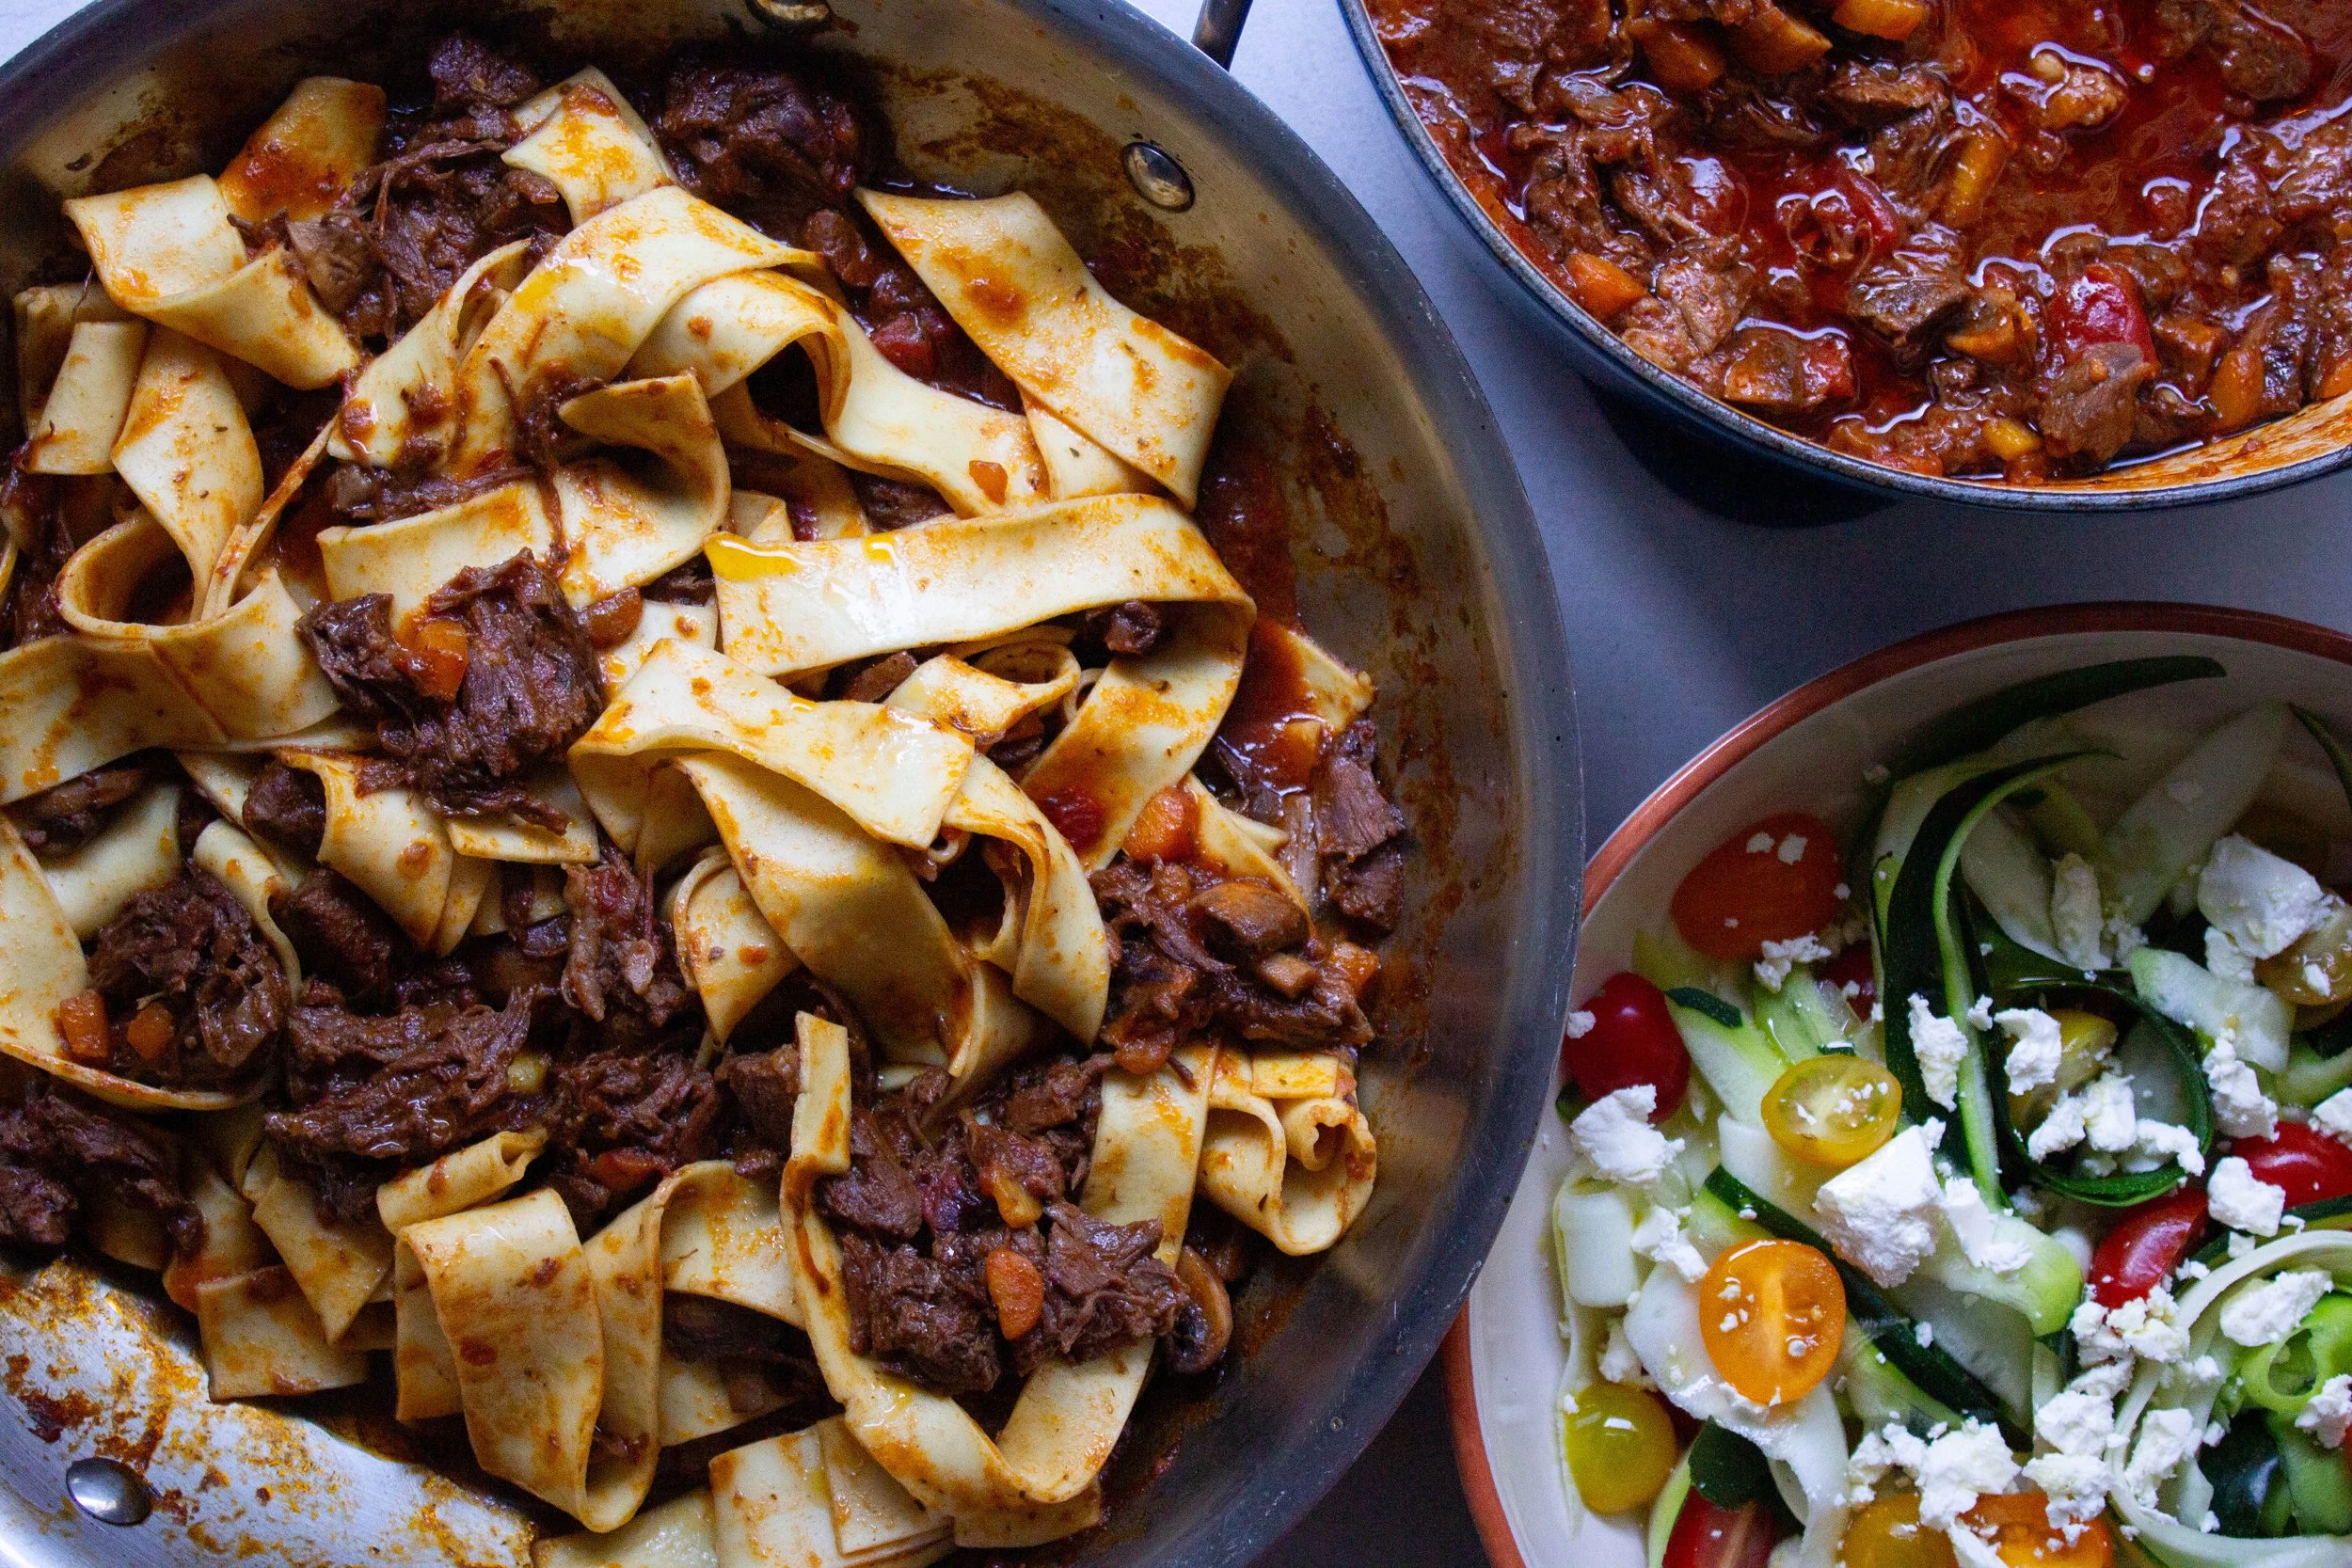
Beef & Mushroom Ragu
The cut I used for this recipe is a chuck steak which is a cheaper cut of meat, but you could substitute any cut that's good for slow cooking.
With the cost of living being so expensive at the moment I've been trying to find ways to cut costs with groceries but not compromise on the quality of what we buy - which is a tricky task. Lucky for us, my husbands family have a property in country VIC and our neighbours have a fully sustainable regenerative farm, so we got a quarter of a cow and now have a freezer stocked full of premium quality beef. It's a very economical way to buy your meat (I'm keen to do it for lamb now too) so I do recommend doing some research into buying this way, direct from the farmers, if you can.
So this freezer full of beef is a mix of different cuts that I wouldn't usually buy but I love this because it's making me get creative and try new things. The cut I used for this recipe is a chuck steak which is a cheaper cut even if your just buying the meat from your butcher, but you could substitute any cut that's good for slow cooking.
The recipe here is for the ragu sauce, which you can use many different ways, however I've also included a pasta recipe too for a very delicious way to use it, and of course I pair it with a salad and add a heap of veg to keep it balanced 😉 Enjoy!
*Oh and don't forget to sunbake your mushrooms! Leaving them outside, stalk facing up, in the sun for 15 minutes can generate up to 100% of daily Vitamin D needs!
Makes sauce to serve 8-10
Ragu sauce:
Ingredients
1kg- 1.2kg chuck steak, cut into 4-5 large chunks
1 x onion, diced
3 x garlic, crushed
2 x carrots, diced
1 x celery stick, diced
2 cups cup mushrooms, (sunbaked*) and cut into quarters
1 x 400g can diced tomatoes
3 heaped tablespoons tomato paste
2 ½ cups beef bone broth/stock
1 teaspoon dried thyme (or 2 sprigs fresh)
1 teaspoon dried oregano (or 2 sprigs fresh)
2 x dried bay leaves
Directions
Pat dry the steak with some paper towel and then season with salt and pepper. Heat a large heavy based pot on high heat, add a drizzle of extra virgin olive oil and sear the meat until browned on each side (in batches if needed). Place the meat aside on a plate. Turn the pot to low-medium and add another drizzle of extra virgin olive oil before adding the onion and garlic. Cook for 2 minutes. Add the carrot and celery, cook for another 2 minutes. Add the mushrooms and cook for another 2 minutes.
Go in with the diced tomatoes, tomato paste, broth, and herbs. Give it a mix and then add the beef back to the pot, submerging in the liquid. Turn the heat down to low (a blip/bubble here and there), and put the lid on to cook for 2 hours.
Check meat and if it’s tender enough to shred, remove all meat from the pot and shred with two forks. Add the meat back into the pot, keep the lid off and cook for another 30 minutes to thicken up. Season with salt and pepper and the sauce is ready to be used (see pasta recipe below) or keep in the fridge/freezer for later use.
Ragu Pasta & Salad:
Serves 4
Ingredients
4 serves your choice of pasta (I used fresh pappardelle)
1 x large zucchini
½ cup cherry tomatoes
¼ cup fetta
2 tablespoons extra virgin olive oil
1 tablespoon red wine vinegar
4 large handfuls baby spinach leaves (optional but great for extra veg)
Fresh basil and parmesan cheese to serve (optional)
Directions
Bring a large pot of salted water to the boil. During this time, prepare your salad by using a vegetable peeler to peel strips of zucchini straight into a small salad bowl (stop when you reach the core and keep that in the fridge for later use). Halve the tomatoes and add them in, crumble over the fetta and then dress with the oil and vinegar before tossing gently. Top with fresh basil if using.
Add your pasta to the pot and cook according to packet instructions (remove pasta a minute before suggested cook time for al dente which is better for our gut bugs).
Meanwhile, take another pot or large fry pan on high heat and add 4 serves (4 heaped cups) of the ragu sauce. This will thicken while your pasta cooks (take it off the heat if it thickens too much) and then add the pasta directly from the pot into the sauce, along with ½ cup pasta water. Add the spinach and mix gently for a couple of minutes to thicken more and coat the pasta well before serving.
Serve with salad and parmesan cheese.
*Sunbaked mushrooms means leaving them outside, stalk facing up, in the sun for 15 minutes as they can generate up to 100% of daily Vitamin D needs!


Chickpea Blondies
I've been wanting to try this recipe for a while and it took me a couple of goes to get the consistency right but I think I've nailed it!
I've been wanting to try this recipe for a while and it took me a couple of goes to get the consistency right but I think I've nailed it! For some, the thought of chickpeas in here might turn you off but being a legume, it is seriously underrated when it comes to impacts on our health. Chickpeas are high in plant protein and also a fabulous source of fibre meaning it is a winner for our gut bugs!
I've used a native ingredient in here, which is fitting for NAIDOC week this week, called wattleseed and it brings such a delicious coffee like flavour, not to mention a heap of polyphenols too (which our gut bugs also love and so do our cells for anti-aging). It is optional but I do highly recommend it if you can get your hands on some as native ingredients have so much to offer from both a flavour and a nutrition perspective.

Makes 12
Ingredients
1 x can chickpeas, rinsed and drained
¾ cup rolled oats
1 teaspoon baking powder
¼ teaspoon baking soda
Pinch of Salt
½ cup sugar (I used loosely packed brown sugar)
¼ cup yoghurt
¼ cup extra virgin olive oil
1 teaspoon vanilla extract
1 teaspoon wattleseed (roasted) - optional
½ cup chocolate chips (or chopped chocolate)
Directions
Preheat the oven to 180°C. Line a square baking dish with baking paper.
Place all ingredients, except for the chocolate chips, into a high speed blender or food processor, blitz until well combined. Stir through the chocolate chips (keep a few to put on top if desired), then spoon into the baking dish. Spread out evenly, top with extra chocolate chips then bake for 25 minutes or until top is lightly browned.
Remove from oven, leave to cool for 10 minutes then slice. These will be super soft when warm and hold their shape better as they cool.

Interested in more snacks that are good for your gut?

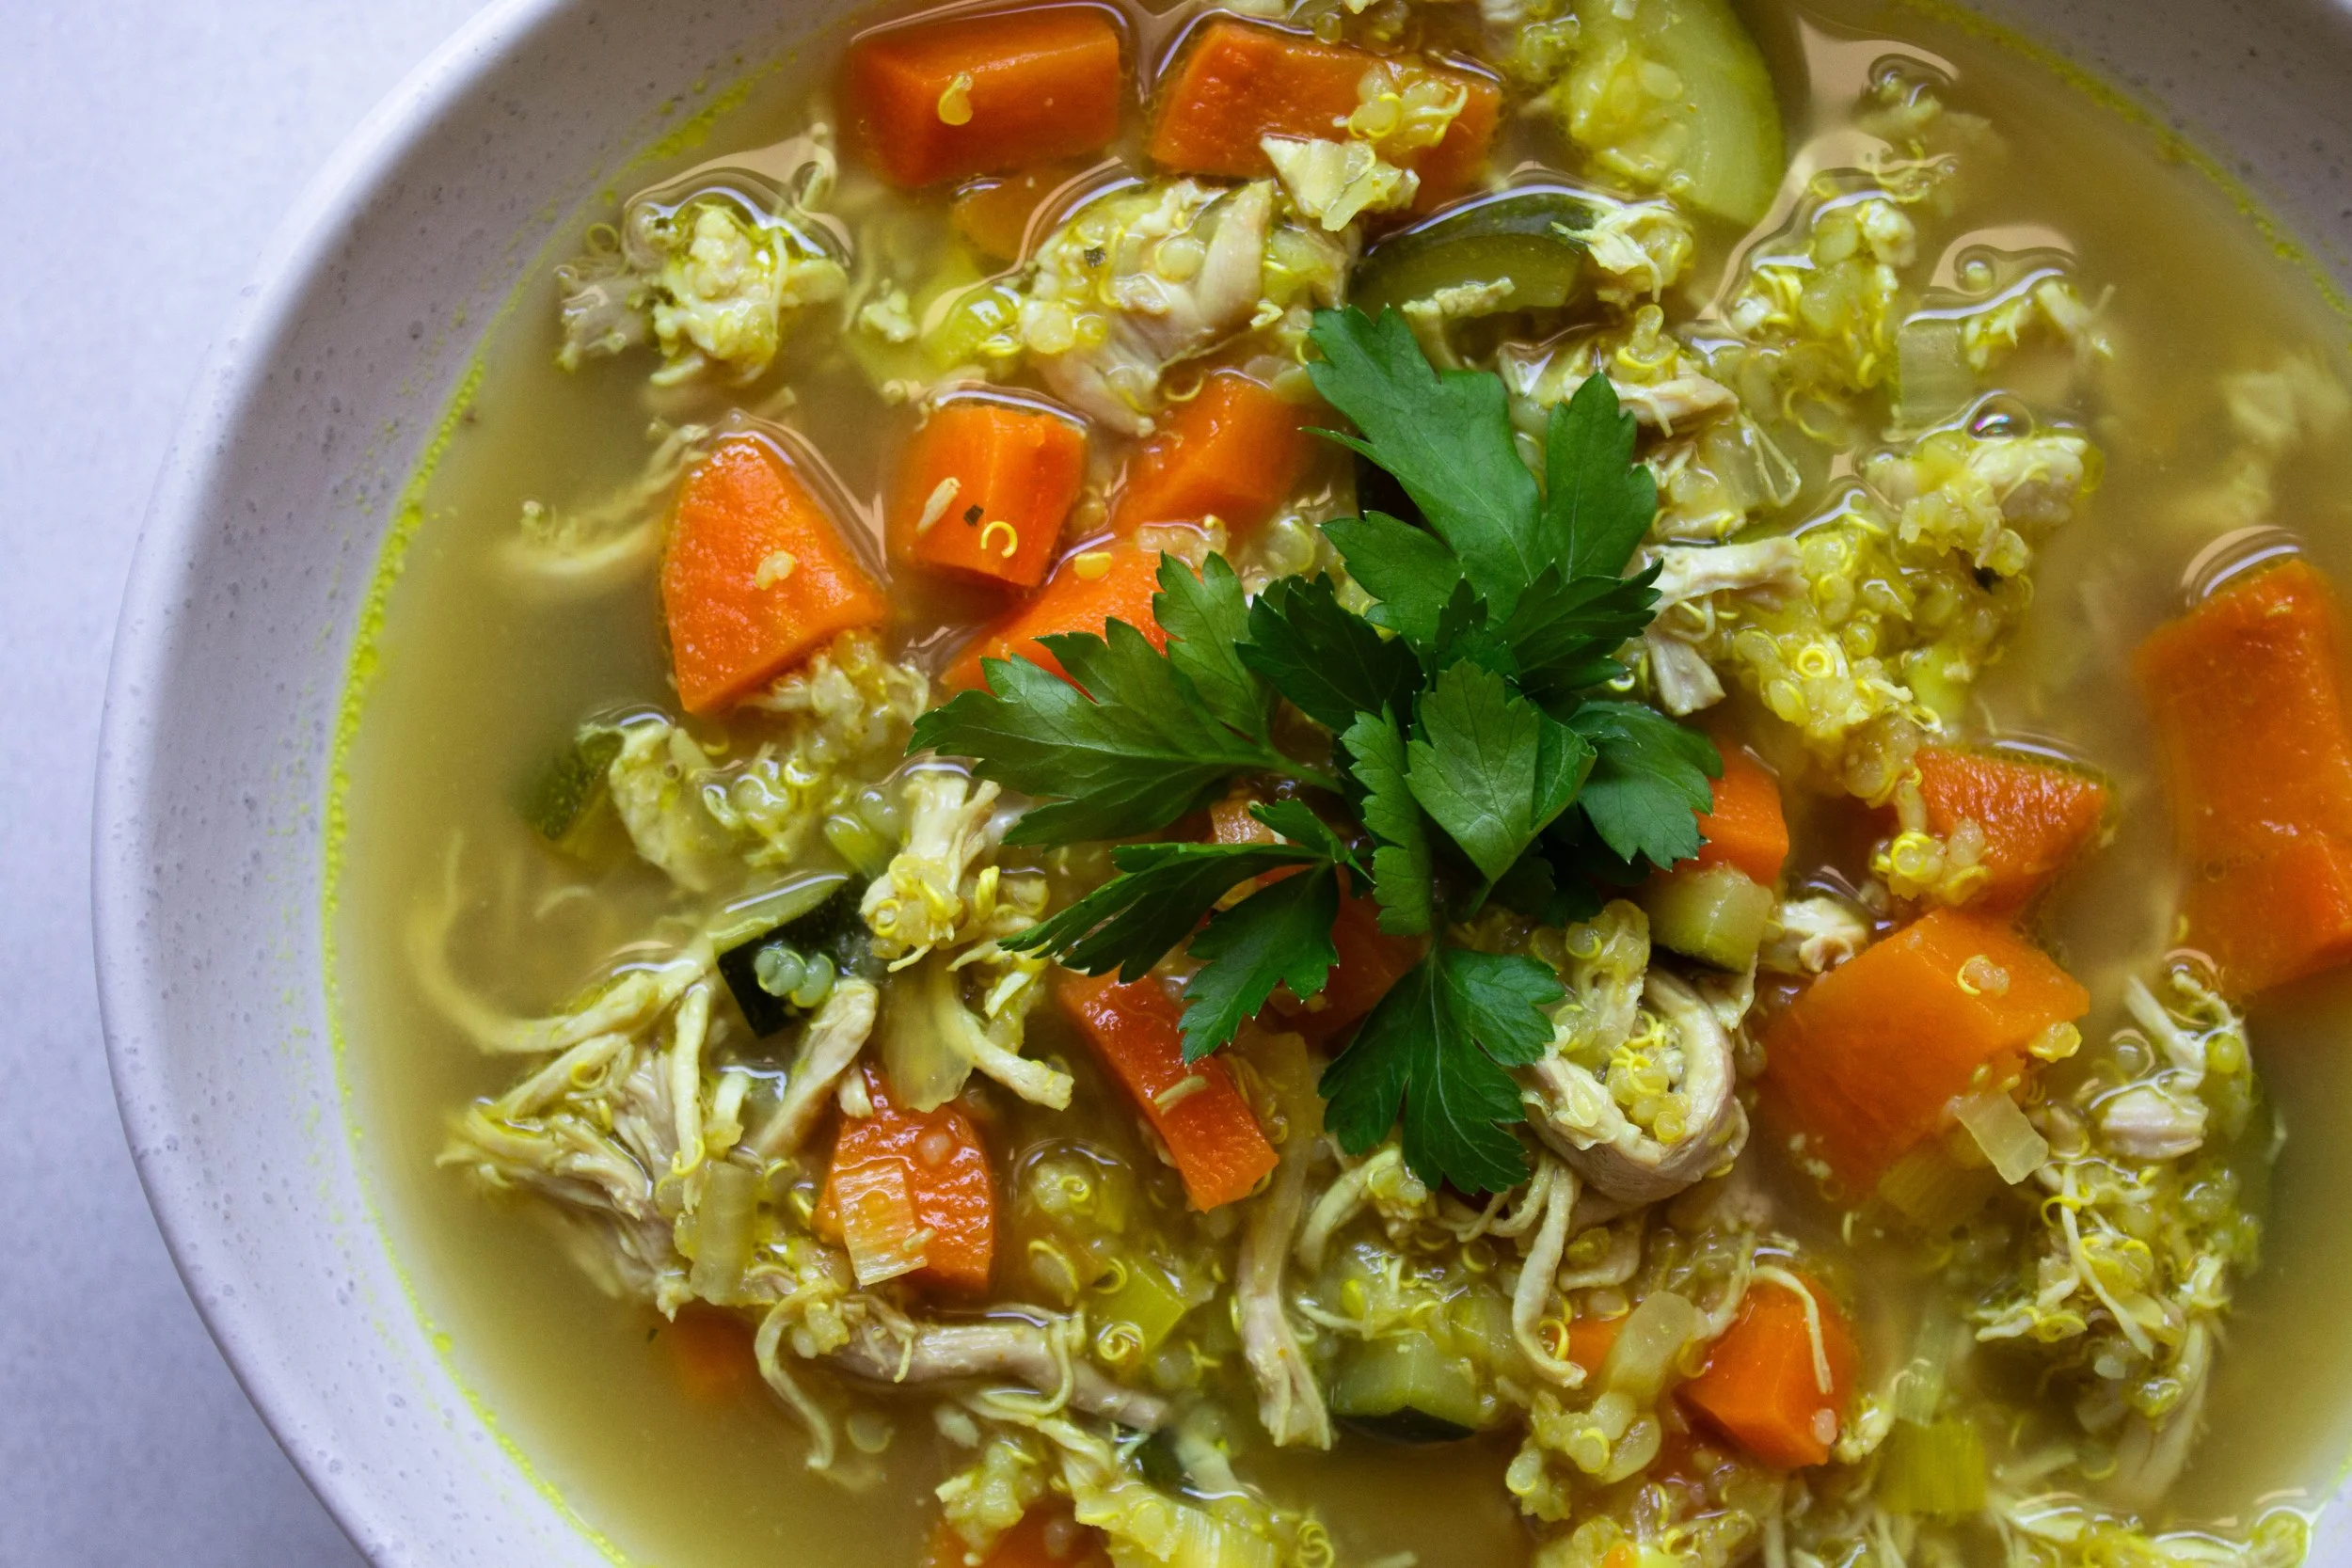
Chicken & Quinoa Veggie Soup
I wanted to create a soup using just the basics I generally always have in the kitchen and I wanted to make some for a friend who just had baby so didn't want it to be too pungent. So hence, here is my Chicken & Quinoa Veggie Soup that is super versatile and will work well with any seasonal veggies you've got.
I've always been more of a fan of chucky soups rather than puree soups as I'm all about the texture. It's rare for me to go past my Chicken Noodle Soup because it is just so damn nourishing and literally one of the best things you can eat to support your immune system, but I wanted to create a soup using just the basics I generally always have in the kitchen and I wanted to make some for a friend who just had baby so didn't want it to be too pungent. So hence, here is my Chicken & Quinoa Veggie Soup that is super versatile and will work well with any seasonal veggies you've got.
If you haven't cooked with ghee before, I highly recommend it, it's a fabulous fat to cook with and bring a delicious flavour to this soup - extra virgin olive oil is a great substitute though. Enjoy!

Serves 4-6
Ingredients
1 x leek, sliced
1 x brown onion, diced
3 x garlic cloves, crushed
2/3 cup quinoa, rinsed
1.5L chicken bone broth/stock
2 teaspoons coriander powder
1 teaspoon turmeric powder
1 x carrot, diced
2 x zucchini, diced
1 x small sweet potato, peeled and diced
400-500g chicken thigh
Directions
Heat a soup pot to medium heat. Add 2 tablespoons of ghee (or extra virgin olive oil) to the pot. Add the onion and garlic, saute until translucent. Add the quinoa, coriander, turmeric, a pinch of salt and pepper, carrot, zucchini and sweet potato and stir. Add the broth/stock and bring to the boil. Reduce the heat to a simmer, add in and submerge the chicken thigh (add some water if you need), cover and cook for 15-20 minutes or until the chicken is cooked through. Remove the chicken, shred (I use a Thermomix, reverse, speed 4-5), then add back into the soup. Serve with fresh parsley and lemon juice.
After some other delicious soup recipes? Try these:

Haloumi, Sweet Potato & Corn Fritters
There's something so appealing about a fritter and when you've got haloumi AND sweet potato in there (two of my favourites), I knew this was going to be a winner!
There's something so appealing about a fritter and when you've got haloumi AND sweet potato in there (two of my favourites), I knew this was going to be a winner! If you want to watch a video of how to make them you can check it out here.

Serves 4 (with a side salad)
Ingredients
180g haloumi, grated
2 cobs of steamed corn, kernels only
1 x small sweet potato, grated
1 x small red chilli, finely grated (optional)
1 x handful of fresh herbs (I used coriander and basil)
¼ x red onion, finely diced
3 x eggs
1 cup wholemeal self raising flour
pinch of salt and pepper
Directions
Combine the haloumi, corn, sweet potato, chilli, herbs and onion in a bowl. Whisk the eggs slightly and then add to the mixture and stir through. Add the flour and a pinch of salt and pepper and then combine.
Heat a large frypan to medium heat and cook the fritters for 2-3 minutes each side or until browned and can easily be flipped.
I served our fritters with a side salad of rocket, tomato, extra virgin olive oil and balsamic vinegar as well as a beetroot hummus, and an avocado, lime and chilli salsa. They would also be yum with some eggs or salmon too.
For the kids:
I made small fritters and served with the same foods as our meal just plated up in a way they like paired with some new foods (my non-adventurous eater even tried rocket for the first time!). 👌
Enjoy!
After some more family friendly recipes? Try these;

5 Gut Health Habits You Should Be Doing in 2024!
Nutritionist Steph Geddes 5 gut health habits you should be doing in 2024. These 5 things are easy, maintainable and super achievable yet will have ENORMOUS impacts on your gut health if you adopt them into your every day eating.
I think, or a least I hope, we are all on the same page that gut health is important. So much so that there isn't really any area of your health that won't benefit from working on your gut health. There's a lot of information out there these days though - from supplements, to powders, drinks and microbiome testing. It can be confusing and overwhelming to understand what will actually make a difference and where to start.
Well, I've got good news. It actually doesn't need to be complicated at all. It can be, if you want to go down that path, but there are some really simple and basic low hanging fruit on offer for us to improve our microbiome, and that's what I want to share with you today. These 5 things are easy, maintainable and super achievable yet will have ENORMOUS impacts on your gut health if you adopt them into your every day eating.
Eat a rainbow of fruits and veggies daily. Yes, this is drummed into us a lot with health messaging but diversity in plant foods is the NUMBER ONE thing science shows has the biggest results in improving microbiome composition. For example, are you a granny smith apple fan? Try red apples next week! Love some red capsicum in your Mexican bowls? Try yellow capsicum next week! Brown onion a staple in your kitchen? Try red onion next week! Follow the seasonal cycle as a great guide to get variety throughout the year.
Add legumes to your weekly meals. I'm talking lentils, beans and chickpeas. These babies are jam packed with prebiotic fibre which our gut bugs absolutely love and we want to aim for legumes 3 x per week. If you have been worried to add them in or currently avoid them, start small - a tablespoon mixed into your meals and then gradually build your way up so my Lentil Veggie Curry, Quinoa and Chickpea Soup or my Mexican Veggie Bake can become regulars in your meal plans. Sometimes feel a big gasy with legumes? You should! A lot of fermentation goes on when we consume legumes and this is actually what makes them so beneficial. This side effect will reduce once you build up your tolerance to having more legumes.
Enjoy fermented and probiotic foods daily. These provide those wonderful live cultures and other compounds that we want to populate our gut with. Try saurkraut, kim chi, probiotic yoghurt or kefir.
Go nuts with nuts and seeds! What I mean here is not in terms of quantity but in terms of variety. There are so many options available from almonds, cashews, walnuts, Brazil nuts, pecans, peanuts (fun fact, actually a legume!), pine nuts, macadamias, pumpkin seeds, sunflower seeds, sesame seeds, flax seeds, chia seeds, hemp seeds and don't forget about spreads like almond butter, ABC butter and tahini. Which can you add to your shopping list to mix it up and give your gut bugs more variety?
Embrace carbs! I'd like to say we're past the whole fear of carbs thing but I know that's not the case for everyone. CARBS ARE GREAT PEOPLE (well the wholegrain ones anyway 😜)! Such a fabulous source of different fibres and studies are showing that those on low carb diets are showing less favourable compositions for gut health. I'm not saying go and eat bowls piled up of pasta but we can absolutely find a balanced way to include them and reap the benefits. Starting with 1/4 of your plate each meal is a good guide.
So there you have it. 5 super easy, achievable (and delicious if you ask me), ways you can have big impact on your gut health for 2024.
Struggling with a lot of gut health symptoms? These tips are a great place to start but you would also benefit seeing a clinical nutritionist, naturopath or dietitian where you can explore those more in depth option like testing, supplements and individual guidance.

Asian Salmon & Soba Noodle Stir Fry
Although I'm usually a crispy skin salmon kind of girl, this baked salmon is a very popular go to recipe in our house! An easy mid week meal where you can even marinate the salmon the night or a few hours before to cut down the prep time. These veggies are great options but feel free to sub in broccoli, red cabbage, snow peas, capsicum, zucchini, mushrooms or whatever the seasons bring.
Although I'm usually a crispy skin salmon kind of girl, this baked salmon is a very popular go to recipe in our house! An easy mid week meal where you can even marinate the salmon the night or a few hours before to cut down the prep time. These veggies are great options but feel free to sub in broccoli, red cabbage, snow peas, capsicum, zucchini, mushrooms or whatever the seasons bring.

Serves 4
Ingredients
Marinade:
1/4 cup tamari
2 tablespoon sweet chilli sauce
1 tablespoon mirin
1 tablespoon fish sauce
1/2 lemon (juice)
1 tablespoon ginger, grated
4 fillets of salmon
1 x onion, diced
1 x garlic, crushed
2 x carrots, sliced into thin half moons
1 bunch broccolini, cut into 2pm lengths
1 bunch boy choy, roughly sliced
2/3 packet soba noodles
Coriander and spring onion to serve.
Directions
Preheat oven to 180C. Combine the marinade ingredients and place in a baking dish with the salmon. Turn the salmon to coat and then bake for 15-20 minutes or until salmon flakes away.
Bring a saucepan of water to the boil. Add your noodles and cook 3-4 minutes before draining.
Meanwhile heat your wok to medium-high heat and add the onion and garlic for 1 minute. Next add the carrot and broccolini for 2-3 minutes. Lastly add the boy choy and cook until the darker green leaves are just wilted. Add your noodles to the wok and toss. Plate up the stir fry and top with salmon, spooning over any the marinade left in the dish.
Top with coriander and spring onion to serve. Kim chi also a great accompaniment.

Wanting some more easy mid-week meals? Try these;

Christmas Gift Guide 2023
It's Gift Guide time! I actually get a lot of joy out of creating these for you because I personally take gifting very seriously - I love researching ideas and put a lot of thought into buying amazing gifts for my loved ones. If you're not that way inclined (mad, as some would say ;P) then don't worry I've got you covered!
It's Gift Guide time! I actually get a lot of joy out of creating these for you because I personally take gifting very seriously - I love researching ideas and put a lot of thought into buying amazing gifts for my loved ones. If you're not that way inclined (mad, as some would say ;P) then don't worry I've got you covered!
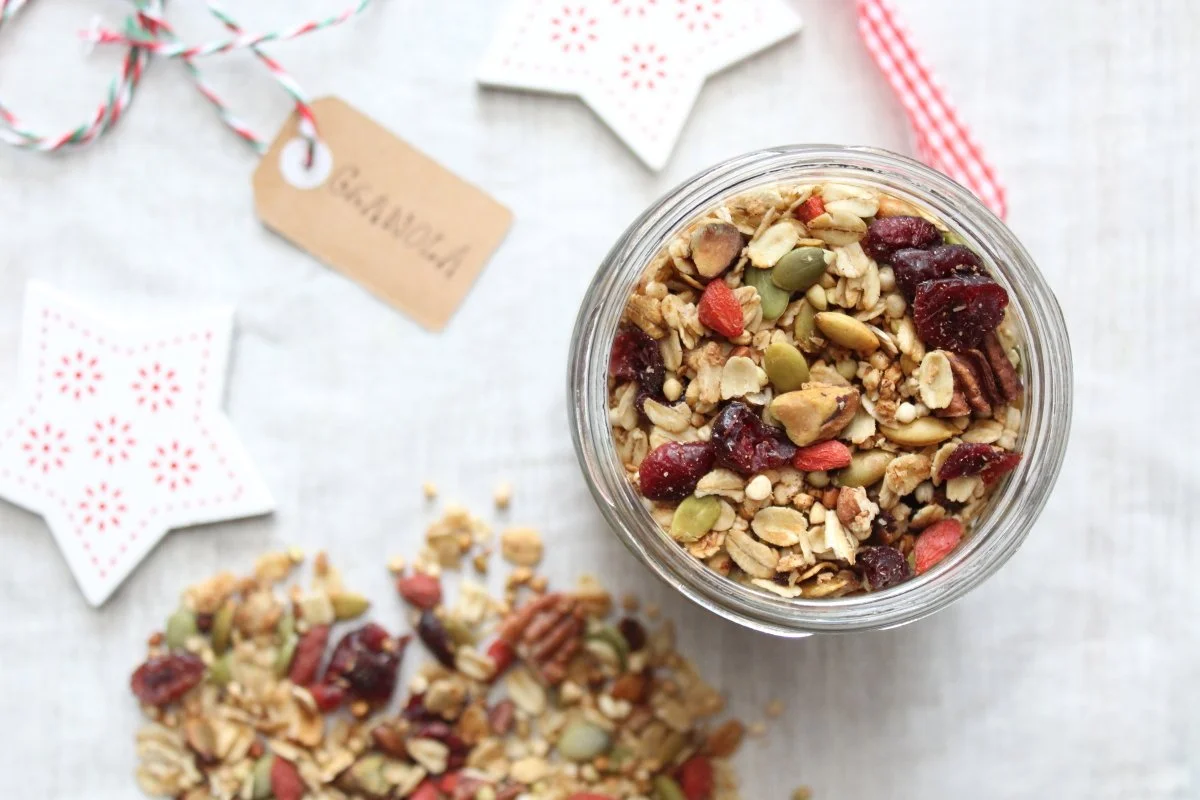
From the serious foodies to the relaxed foodies, the cocktail lovers or the tea lovers and everyone in between there is an option for all foodies at all price points. Or if a homemade gift is more your vibe then definitely check out my Gingerbread Granola which can be baked up and popped into a beautiful jar with a pretty bow for minimal fuss and cost but impressive none the less!


Chocolate Avocado Mousse
Avocadoes are in season, cheap and delicious right now, so I wanted to show you a way you can use them up that isn't a salad!
Avocadoes are in season, cheap and delicious right now, so I wanted to show you a way you can use them up that isn't a salad! This mousse is super rich and totally yum, but the best part is it's packed with fibre, polyphenols (both of which our gut bugs love), and has a natural mood boosting effect thanks to the cacao. Cacao is also a wonderful source of magnesium and provides some iron too.
As it is very rich, a little goes a long way and it pairs perfectly with fresh berries and mint for more of a nutritional punch! Enjoy.

Serves 6-8
INGREDIENTS
2 x ripe avocados
½ cup cacao powder
200ml coconut cream
4 x Medjool dates, pitted and soaked in hot water for 10 minutes
1/3 cup maple syrup
1 teaspoon vanilla extract
Pinch of salt
To serve: Mint leaves and strawberries
DIRECTIONS
Place all ingredients in a food processor and blend until smooth. If needed add 1-2 tablespoons of water. Adjust sweetener if preferred. Serve straight away or set in the fridge for at least 1 hour and serve with fresh mint leaves and strawberries. *Keeps in the fridge for 3-4 days.

Want more mood boosting meals? Try these…
Want more healthy sweet recipes? Try these…

Orange & Almond Cake
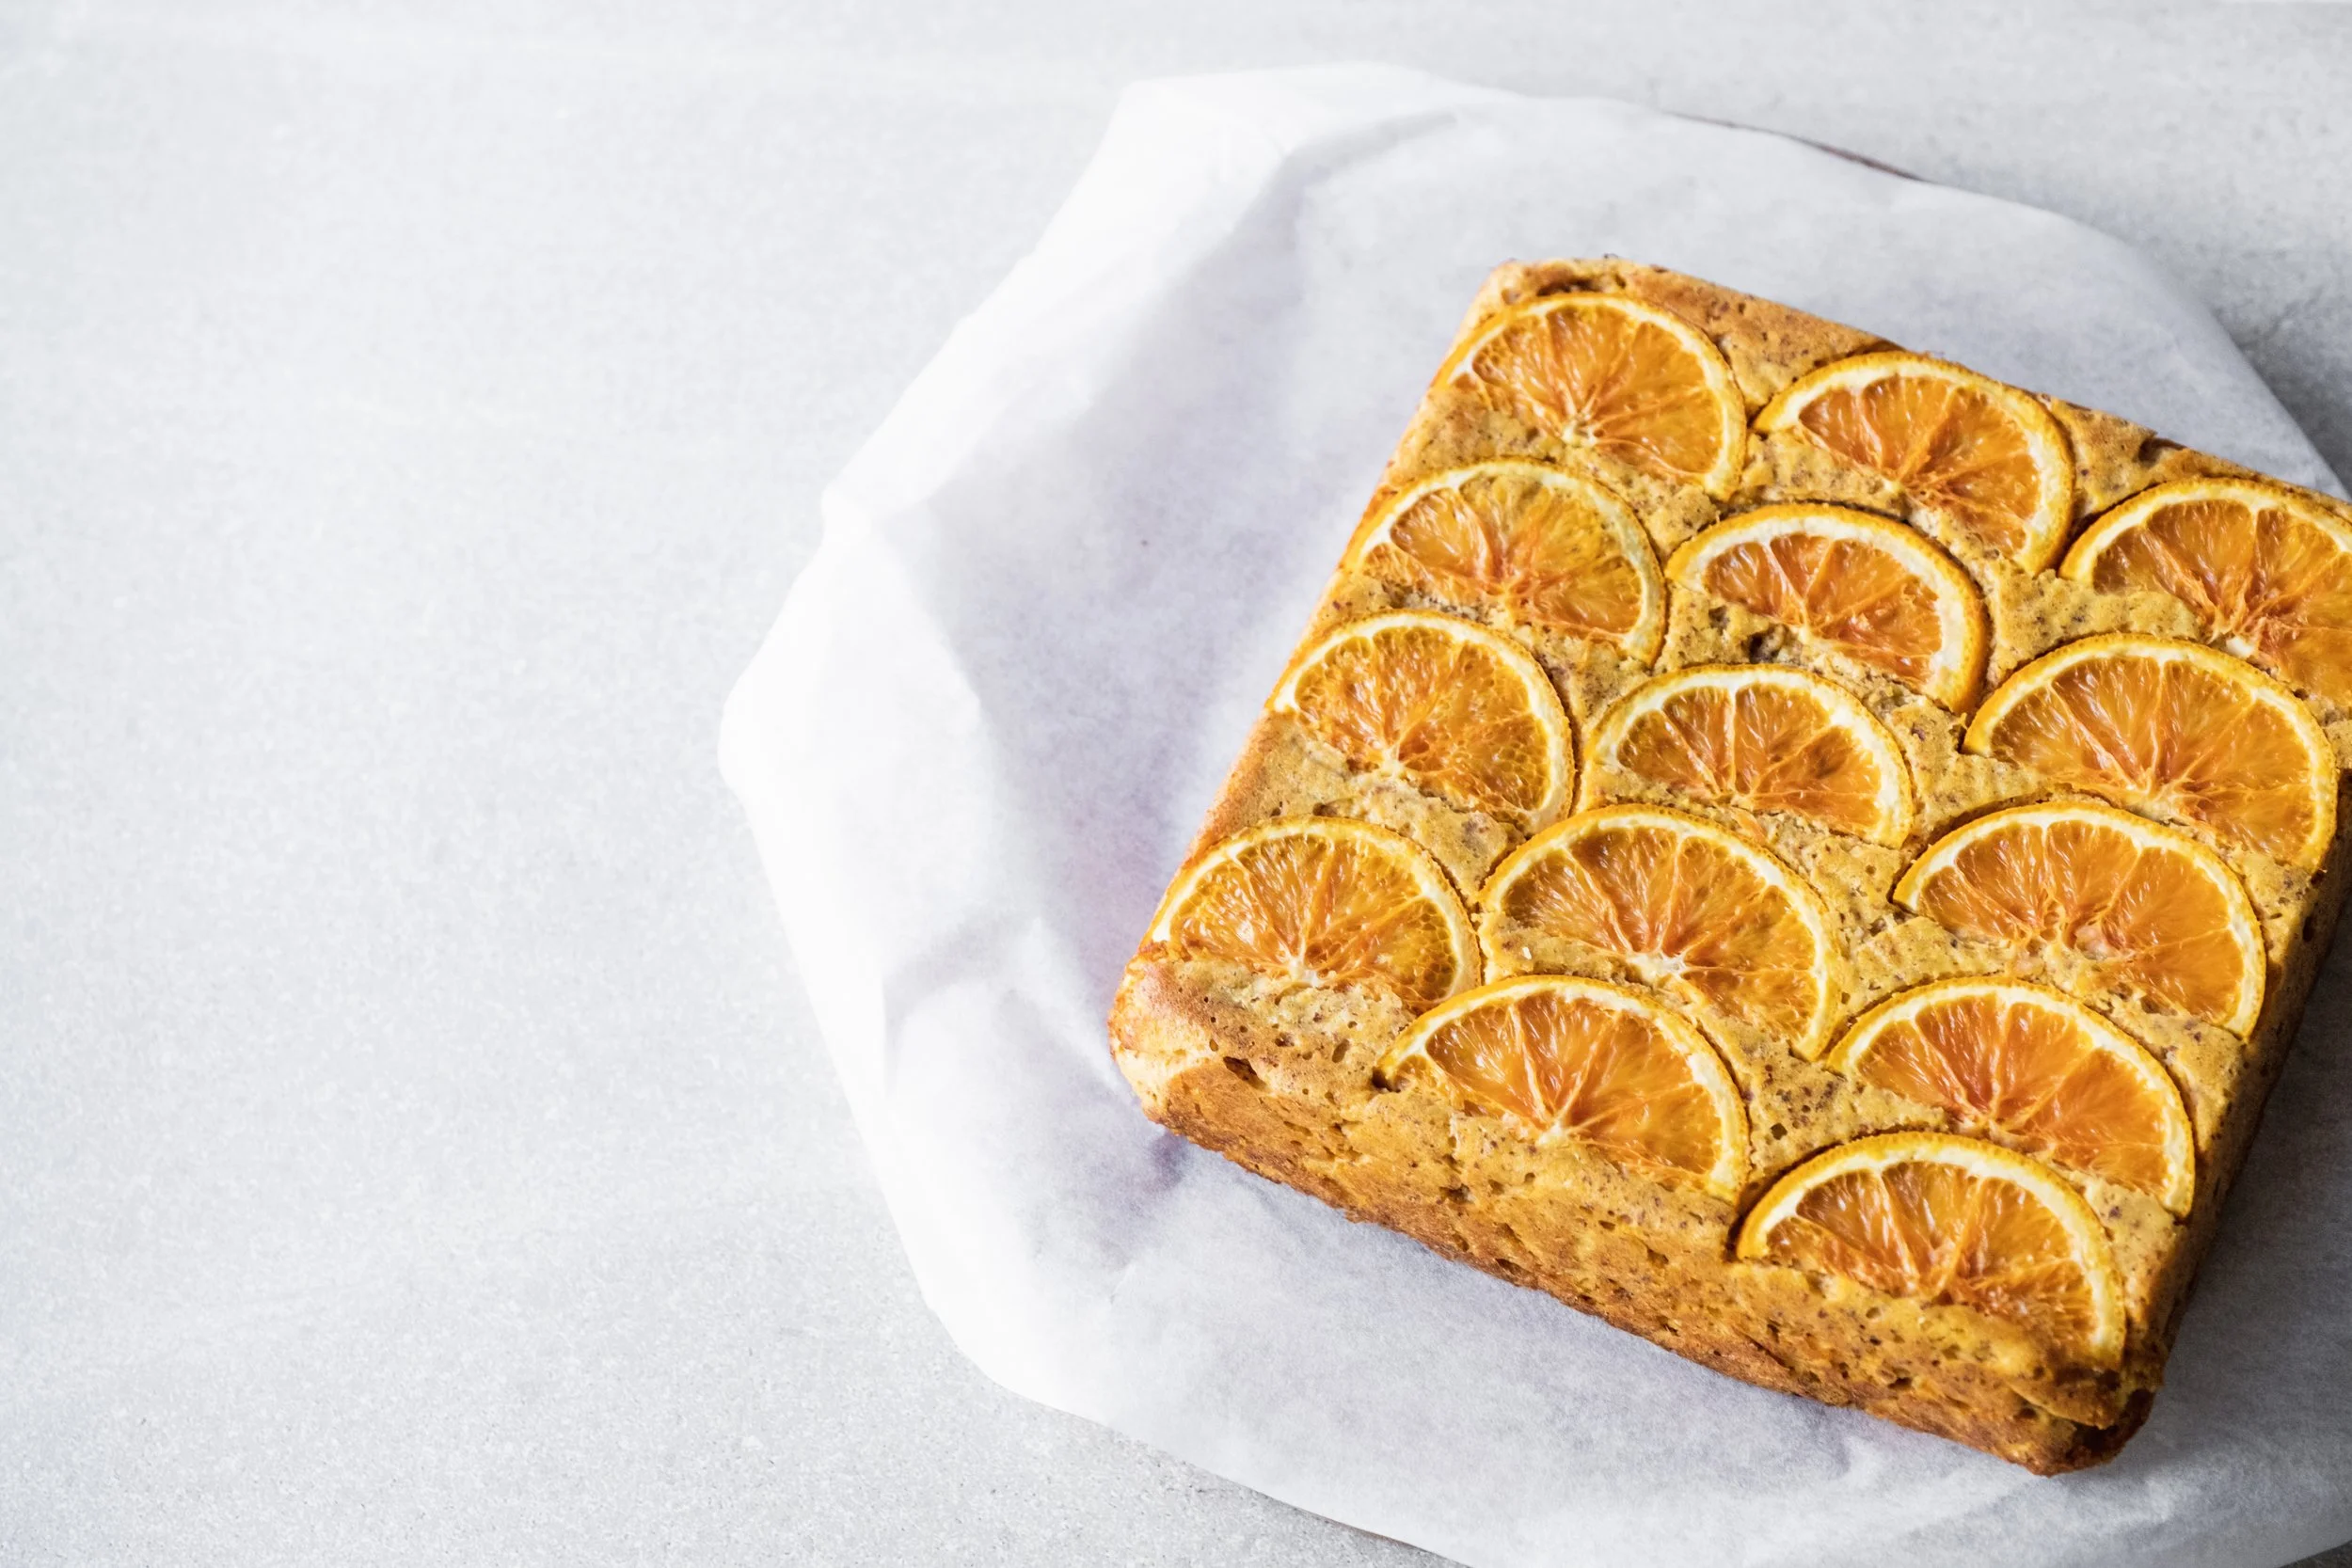
This recipe is such a beautiful dessert! I don't do cakes often but this cake only has 6 ingredients AND is zero waste - yep, we use the whole orange!
This recipe is such a beautiful dessert! I don't do cakes often but this cake only has 6 ingredients AND is zero waste - yep, we use the whole orange! We use a method of boiling the oranges first to take away the bitterness of the skin and it results in such a delicious flavour and is a super impressive dessert if you are entertaining. Pairs perfectly with some Greek yoghurt/kefir or just good old fashioned cream - and I love some roasted pistachios too, yummm!! Enjoy.
Orange & Almond Cake
Makes 16 serves
Ingredients
4 x small oranges
4 x eggs
½ cup maple syrup
1 teaspoon vanilla extract
3 cups almond meal
2 teaspoons baking powder
Directions
Heat oven to 180°C. Place three of the oranges in a saucepan with a lid and cover with cold water. Bring to the boil, lower temperature, and simmer for 40 minutes, making sure they remain covered with water. Once cooked, take them out of the water and set aside to cool.
Meanwhile, line a 24cm square cake tin with baking paper. Take the remaining orange and thinly slice into half moons, then arrange the slices in the base of the cake tin.
Cut the boiled and cooled oranges into wedges and remove any seeds, place them in a food processor (skin and all) or blender with the eggs, maple syrup and vanilla. Blitz until smooth then mix together with the almond meal and baking powder. Pour the batter into the prepared tin and bake for 40-50 minutes or until a skewer comes out clean. Allow to cool, then turn the cake out onto a plate and serve.
Serving tips: Goes well with Greek/kefir yoghurt or cream and some chopped, roasted pistachios.
Looking for some more dessert ideas?
Try these favourites below: